


- Over 450,000 clients!
- Nationwide delivery from €4.99 (max €6.99)
Payment options

Follow us on social media
We're award-winning!


This site is protected by reCAPTCHA and the Google
Privacy Policy and
Terms of Service apply.
Make stickers at home
There’s no need to visit a print shop to make professional looking stickers. In fact, it’s easy to create stickers yourself at home. There are three simple ways to create stickers at home. We’ll walk you through each option below.
Making Cricut stickers
Making your own stickers is simple with a cutting plotter. Cutting plotters are versatile machines that can cut, draw, and laminate. This allows you to create decorations easily at home that look professional. Want to make stickers yourself? A Cricut cutting plotter makes it easy. Follow the steps below with a Cricut Explore or Cricut Maker and easily create creative stickers yourself.
1. Choose the stickers you want to make
Open the Cricut Design Space app and start with a new canvas. Here you’ll have three options for choosing what stickers you want:
-
Custom-designed stickers: Upload your own designs from Canva, Procreate or Adobe InDesign. With these design programs, you have complete creative freedom and can create personalised logo stickers.
-
Existing designs: search for printable images in the Cricut Image Library and select the desired stickers. Here you can also create existing text stickers.
-
Making stickers in Design Space: Create your own design in Design Space. You can combine multiple layers to create a unique design.
Create a template by choosing a square from the shapes library in a size of 6.75 x 9.25 inches. Then place the stickers on the template. Are all the stickers in place? Then remove the square, select all the images, and attach them to each other. You now have a single image with stickers without a background. Now you can print the stickers yourself.
2. Select the correct printer settings
Click 'Create', select your printer, and then click 'Print'. To change the printer settings, you can also click on the settings in the dialog box. You will see a black outline around the stickers on the sheet. The Cricut cutter uses the black outline to cut out the stickers correctly.
3. Choose and cut the Cricut material
Insert your chosen cutting plotter material into the printer. Check whether the material in your printer needs to be positioned printable side up or down. This depends on how your printer feeds the paper, so check this in advance. Now click 'Print'.
Place the printed sticker sheet in the top-left corner of a LightGrip cutting mat. Select the material to be cut. This lets the cutting plotter 'know' that stickers need to be made.
Choose the correct settings for the material. Press the flashing arrow button and load the mat into the printer. The cutting plotter now uses its sensors to read the black lines. If it does not detect the lines, move the machine to a darker spot. Once detected, it begins the cutting process. As soon as this is finished, press the flashing arrow button again. You can remove the mat from the machine and use your stickers!
Making stickers with your home printer
If you have a printer at home, then you can print stickers in no time with your home printer.
All you’ll need is a printer, a design of your choice and sticker paper. Follow the three simple steps in our article on printing stickers and labels to get started immediately. This option is suitable for creating address labels, labelling belongings, or printing round promotional stickers.
Making stickers with magnetic photo paper
Magnetic photo paper stickers are made of magnetic foil. This means you can easily stick the stickers onto metal surfaces. Afterwards, you can remove them without leaving any adhesive residue. Magnetic stickers are suitable for many applications. For example:
-
Businesses: you can promote temporary offers and create car stickers.
-
Warehouses: you can easily label warehouse shelving and simply remove the magnetic stickers when moving stock.
-
Schools: Magnetic stickers with a whiteboard laminate can be written on with whiteboard markers and then erased. Ideal for creative presentations, quizzes, and other information.
-
At home: you can use magnetic photo paper to print your favourite photos and stick them on the fridge.
1. Prepare the designs or photos
Assemble your photos or designs in an image editing program of your choice. Then select the print format. The format depends on the size of the magnetic photo paper. Next, set the resolution and indicate whether you want to print in colour or black and white. Check that everything is set correctly and print a preview on standard printer paper.
2. Print the design on magnetic photo paper
The test prints been a success? Then you’re ready to print on magnetic photo paper. Set the printer to 'heavy paper' (at least 160 g/m²). Then select 'manual feed'. This ensures you print only one sheet of magnetic paper at a time. This reduces the risk of a paper jam. This way, you can easily print your stickers yourself.
3. Cut out the designs
Now you can start cutting out your stickers. Choose a white border for your stickers and trace around it with a pencil if desired. Or cut out the sticker accurately without a white border. Want to cut very precisely? Then use a cutting mat and a utility knife. After that, your magnetic stickers are ready to enjoy!
Other useful products

Common questions
What do I need to make my own stickers?
You can create stickers with a Cricut machine or a regular printer and photo paper of your choice. In this blog, we outline 3 three easy methods and the materials you need for them.
How do I make professional stickers myself?
You can create professional stickers with a Cricut plotter (Maker and Explore). Choose the stickers you want to print, print them, and have the Cricut machine cut them out. This blog explains in detail how to do this.
Can I make stickers with my own photos?
Yes, this is possible with magnetic and self-adhesive photo paper and a printer. Compose the photos in Word or a design program and print the sticker photos. Then you can cut them out and stick them on.
Do you have questions about mkaing stickers? Check out our FAQ page. We answer frequently asked questions there. If you can't find the answer to your question, our customer service team is happy to help.
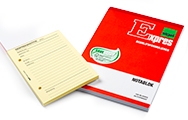
| 123ink white A4 glossy photo sticker paper (10-pack) | ||
|
|
||
| Order now, we can ship this tomorrow! | ||
|
€4.95
€4.02 Excl. 23% VAT
|
In stock
|
|
 300223")
 300223")
 300223")
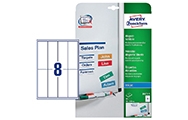
| Removable round labels (Ø 60mm) | Avery L3416-100 | 1,200 labels | ||
|
|
||
|
€35.50
€28.86 Excl. 23% VAT
|
EU warehouse
|
|
 | Avery L3416-100 | 1,200 labels 212464")
 | Avery L3416-100 | 1,200 labels 212464")
 | Avery L3416-100 | 1,200 labels 212464")
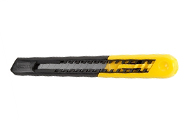
| Scissors (195mm) | 123ink soft grip | ||
|
|
||
| Order now, we can ship this tomorrow! | ||
|
€4.50
€3.66 Excl. 23% VAT
|
In stock
|
|
 | 123ink soft grip 300957")
 | 123ink soft grip 300957")
 | 123ink soft grip 300957")

")


